Classic Sourdough English Muffins
You’ve likely said, “I’d like an egg McMuffin.” OR have been walking into the store and have seen in bold “Nooks and Crannies!” Both of these require a classic English Muffin. Many recipes use Active Yeast and are a little quicker than the one that we’ve developed, but the flavor in ours is WORTH the wait, WE promise! Here’s how to make our Classic Sourdough English Muffins.
Ingredients:
Wet:
1 C of fed/proofed Sourdough Starter
1 C whole milk (fat content doesn’t matter)
1 C Buttermilk, shaken before poured (fat content doesn’t matter)
2 T honey
*4 T ghee or melted butter (for either, liquid form and cooled)
DRY:
Up to 6 C All-Purpose flour (we tested Bread Flour and the results made NO different in texture and taste for this recipe)
2 t kosher salt
1 t baking soda
¼ C corn meal or semolina flour
Other Stuff you’ll need:
11-13 Quart Bowl
Wooden Spoon (I use a “Spirtle”)
3-4 inch rim glass or cookie cutter that size
rolling pin
2 cookie sheet
2 clean kitchen towels
hot plate OR Iron Skillet
Cover to fit skillet
Canola oil
Meat thermometer (something with a probe; a candy thermometer won’t work here)
Wire rack for cooling
Instructions:

Night before:
Turn on the oven to warm 100degF when you start to assemble.
In a LARGE bowl (11-13 quart), put in all of the honey, ghee and starter and a about ½ C of the whole milk. Stir enough to break up the starter so that the mixture is fluid. Add the rest of the milk and buttermilk.
Incorporate 4 C of the flour by sprinkling 2 Cups over the mixture and stiring; then repeat (your arm will get a work out by the end) You just want for all of the flour to be wet and combined. The mixture will look a bit shaggy and have some stickiness to it. . .
Turn the oven OFF and leave the light on. Cover your bowl with a plastic wrap, leaving a little hole for air and a towel. Making sure that the oven is no warmer than 100 deg (I have a “hot” oven), place your covered dough in the oven. You’re done for 11-16 hours. . .
Next Morning:
Sprinkle cornmeal onto two cookie sheets. Remove the dough bowl and repeat the oven 100degF warming method (you’re basically making a “proofing” space).
Dough will have developed and proofed about double in size. Deflate the mass in the bowl and sprinkle the salt and baking soda over top. With your wooden spoon, start to fold the dough over on itself and sprinkle about ½ cup of flour over top and mix until incorporated just to make it not as tacky.

Just out of "dough bowl"

after the kneading process
Dust a surface with a GENEROUS amount of flour (nearly a cup) and pour the dough out on the floured board. This is where you get the “workout!” Knead the dough for about 5 minutes by “fold, push, rotate method,” incorporating flour until you get a smooth ball. You’ll need to add a total of about 1 ½ cups of flour to the mass (more or less depending on feel and accuracy in the measuring of the wet ingredients the night before). I like to make sure that the dough doesn’t “rip” when my palm pushes into it. It should come together in about 5 minutes. Turn oven off, but leave the light on.
Once you have a smooth elastic ball of dough, take your rolling pin and roll the dough out until it’s about ½ inch thick. This seems a weird step for dough, I know. . . Take your glass or cookie cutter and cut out your shapes as closely together as possible. Place the rounds of dough onto your prepared baking sheets about 2 inches apart. WHAT DO WE DO WITH THE SCRAPS?!?!? The dough is still tacky enough that you can “re-knead” and roll the scraps and get more muffins. Waste not, want not! I usually get about 26-30 rounds using my 3 inch cutter.
Sprinkle a bit more corn meal on top of each round and cover the pan with a clean towel and stick these in the oven (heat turned off, light on) to rest/rise for about an hour.

Here’s a variation that you may want/have to take. . . If you don’t have a skillet and cover (griddle instead), take the muffins out of the oven after 30 minutes of this proof and turn your oven to 350DegF to preheat. You’ll see why in a sec. . .
ENGLISH MUFFINS AREN’T BAKED IN THE OVEN, per se . . .
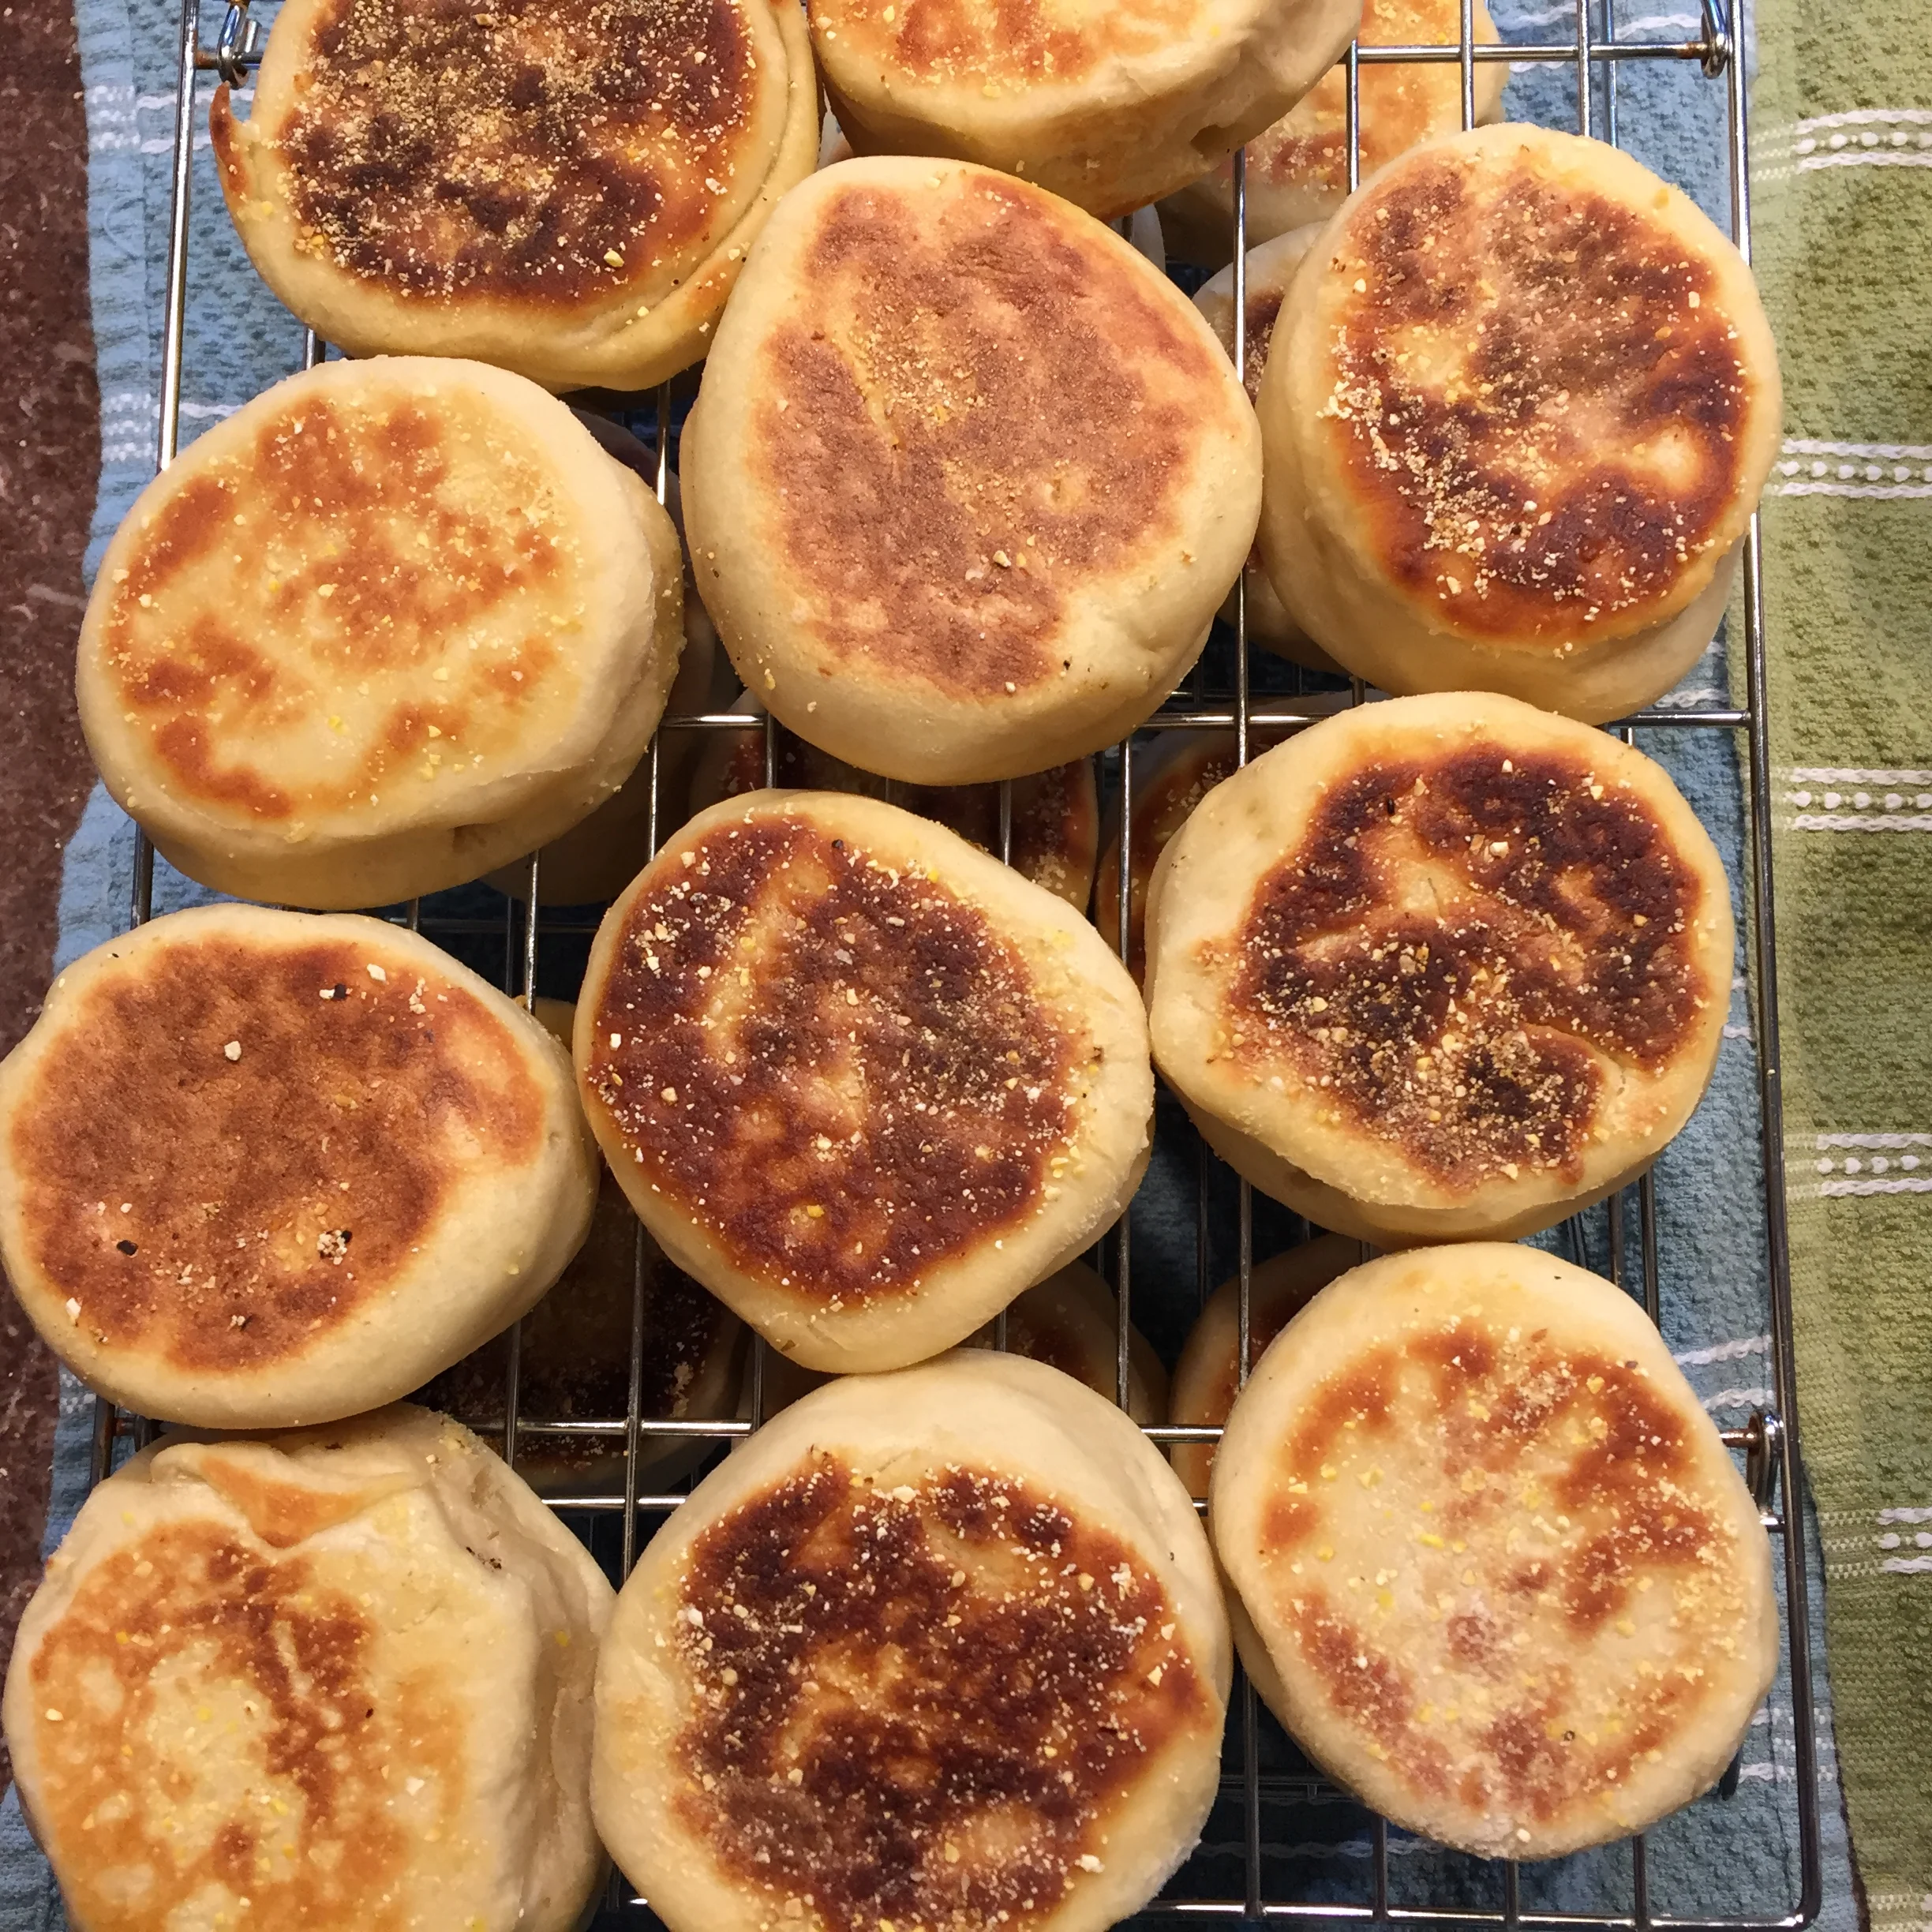
Get your skillet hot on medium low heat (if you have a griddle with a temp setting, about 350degF), and coat the pan with about 1T of canola oil. We tried several different kinds of oil, but I always got “smoke” at this temp with olive oil or butter. . . Uncovering only a few of your rounds, gingerly lift and then place into your hot pan being careful not to let them touch as the sides will remain tacky until cooked. Cover. Cook for 4-5 minutes and then turn over gingerly and repeat with covering and cooking for 4-5 more minutes. THE REASON for the covering is to keep the steam in! Probe the largest dough round on an outside of the pan and see if it has reached between 190-200degF. If so, you’re DONE!

If you don’t have this opportunity for covering (or both sides are brown, but you don’t have the appropriate temp), place your muffins on a baking sheet and stick them in the preheated oven for about 7-10 minutes; this should achieve heating to the desired inside temperature.
Once your muffins are to the right temp and perfectly brown, remove and let cool completely on a wire rack.
IMPORTANT! Do not take a knife to cut the English muffins. The proper way to “cut” is taking a fork and probing the side in and out, all the way around.

These will store in an airtight container for about 4 days! You could also freeze them. There are a LOT, so if you’re not feeding an army, it may be overwhelming to eat them all; although, they are so good that you want to!